
10 Fall Art Projects Kids Will Love
Look outside—the world is transforming into a painting right before our eyes! Autumn is one of the most colorful and magical seasons. Trees blaze with shades of red, orange, and yellow. Leaves swirl through the air, pumpkins decorate porches, and the crisp breeze reminds us that change is beautiful. Artists throughout history looked to the seasons for inspiration, and fall is one of the richest times to create art projects in the classroom.
For the fall art projects below, I encourage my students to take inspiration from the outdoors and use it in their art-making. Some days, we’ll collect real leaves, twigs, and acorns to use in our projects. Other days, we’ll use paint, pastels, clay, or collage to capture the mood of autumn. Together, we’ll explore textures, warm colors, and the beauty of nature while experimenting with many different art materials. Try these elementary fall art projects with your students this season!

1. Abstract Fall Tree
A fun but messy lesson! Create an abstract fall tree using ink and bleeding tissue paper.

Recommended Supplies
- Paintbrush
- 6 x 18 white paper
- Bleeding tissue paper (warm colors: red, orange, yellow)
- India ink
- Straws
- Pipette (for teacher use)
- Water bucket
Instructions
This project connects different methods of art that students may not be used to. It is a fun abstract artwork that students love and that creates great results. First, give students a container of warm-color bleeding tissue paper squares. Students use water and a paintbrush to wet 1/4 of their paper. Students place pieces of tissue paper on the wet paper. Repeat until the entire paper is filled with color. Let dry and remove the dried pieces of tissue paper. To create the tree, you will use a pipette to put a few drops of india ink on the paper. Students will use a straw to blow the ink until it dries to make the shape of a tree. Add more drops of ink as needed until the students are happy with their trees.
2. Leaf Color Wheel
Go on a leaf hunt! Find a leaf to create texture rubbings and a color wheel.

Recommended Supplies
- Crayons
- Leaves (gathered by students or teacher)
- 12 x 12 white drawing paper
Instructions
You need leaves for this project; either collect them beforehand or go outside with your students to gather them. Give students a square piece of paper and crayons. They will place their leaf under the paper and create a color wheel by rubbing over the leaf on top. Students will repeat with each color until the color wheel is complete. Optional: Lightly sketch a circle and the lines for the colors so kids know where to place their leaves. ELA extension: Read The Rainbow Tree by Jed Dearybury.
3. Van Gogh Fall Landscape
Explore Vincent van Gogh’s landscapes this fall while students layer foreground, middle ground, and background in vibrant chalk pastels.

Recommended Supplies
- 9 x 12 brown construction paper
- Pencil
- Warm-colored chalk pastels
Instructions
This project introduces students to Van Gogh’s expressive landscapes while teaching them about foreground, middle ground, and background. First, introduce Vincent van Gogh and show images of his landscapes. Using brown construction paper in landscape orientation, students use a pencil to draw the parts of the landscape including foreground, middle ground, background, and any details they want to add. Then they use warm-colored chalk pastels to add “brushstrokes” like lines to fill the paper. Extend the lesson to ELA by having students describe their scene in writing.
4. Line Leaf
Celebrate fall with a leaf art project that blends line, color, and pattern into a vibrant seasonal design.

Recommended Supplies
- 9 x 6 warm-colored construction paper pieces (red, orange, yellow)
- Ultra-fine-point permanent markers
- Leaf stencils
- Scissors
- Pencil
Instructions
This lesson combines the elements of art line and color. Let students choose a warm-color paper. Students have the choice of using a pencil to draw their own leaf or tracing a leaf stencil. After they are confident in their leaf outline, they will use a permanent marker to trace it and divide the leaf into different sections. Students will use a thin permanent marker to draw lines that create repeating patterns in each section until the leaf is full. When complete, they cut out the leaf.
5. Watercolor Pumpkin
Introduce the magic of fall with a simple and colorful watercolor pumpkin project.

Recommended Supplies
- Black crayon or oil pastel
- Watercolor or tempera cakes
- 9 x 12 white paper
Instructions
Perfect for preschool and kindergarten, this art activity helps young learners celebrate the season while building foundational art skills. Students start by drawing a pumpkin with a black crayon or oil pastel, creating bold lines that resist the paint. Using watercolor or tempera cakes, they then fill in their pumpkins with vibrant fall colors. Each student’s creation becomes a festive and unique fall masterpiece!
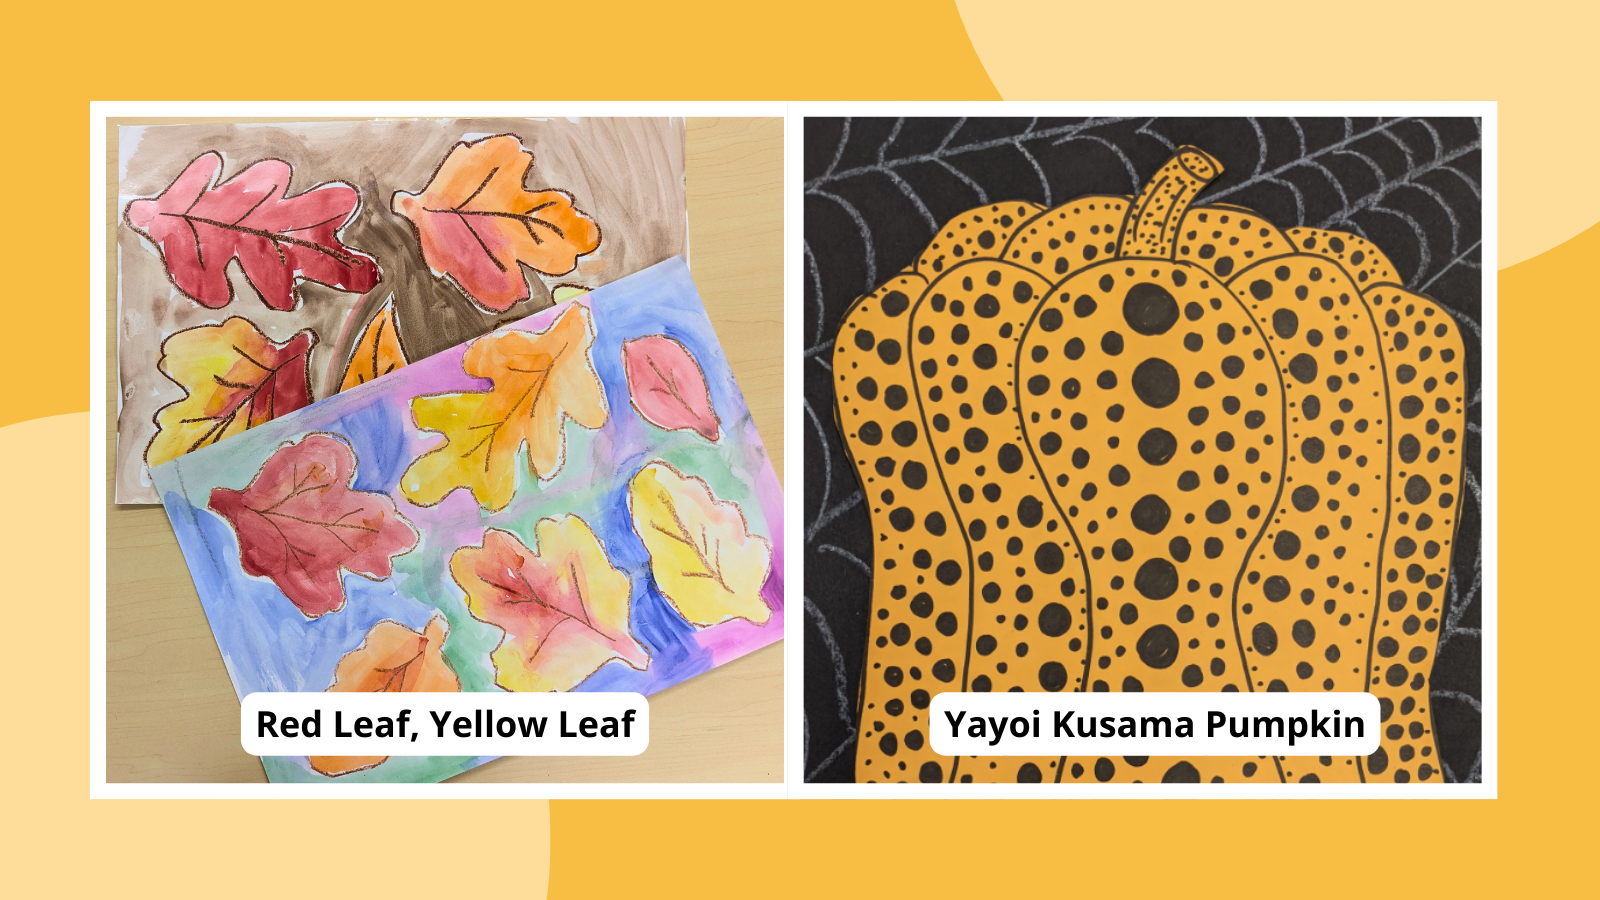
6. Red Leaf, Yellow Leaf
Students will discover warm and cool colors and create their own fall scene of falling leaves inspired by Lois Ehlert’s book.

Recommended Supplies
- 12 x 18 white paper
- Brown oil pastels
- Tempera cakes
- Water bucket
- Paintbrushes
- Leaf tracers
Instructions
This project introduces warm and cool colors for younger elementary students. Read Red Leaf, Yellow Leaf by Lois Ehlert to students to teach about warm colors and leaves changing in the fall. Give students a variety of leaf stencils and oil pastels. Students will use a brown oil pastel to trace five or more leaves and add veins in each leaf for detail. When finished tracing, use warm colors to paint the leaves. They can paint them a single color or a mix of colors. Students can paint the background using either cool colors or brown as if they are lying on the ground.
7. Tissue Paper Fall Tree
Use a variety of materials to create a fall tree landscape with slight relief.

Recommended Supplies
- 9 x 12 white drawing paper
- Oil pastels
- Tempera cakes
- Water bucket
- Paintbrushes
- Liquid glue
- Container for glue
- Warm-color tissue paper squares (red, orange, yellow)
Instructions
Discuss how a tree looks in real life—how it’s planted in the ground, the sky is all around it and not just above it, etc. Students will use a brown oil pastel to draw a realistic tree and the ground around it. Then they’ll paint the background, all the way to touch the ground, filling the space. Give the students warm-colored tissue paper squares and a plate of liquid glue. They will crumple individual pieces of tissue paper, dip them into the glue, and place them on the tree to fill the branches.
8. Yayoi Kusama Pumpkin
Get wild and create a fun pumpkin covered in dots in the style of Yayoi Kusama!

Recommended Supplies
- Scissors
- 9 x 12 bright-colored construction paper
- 9 x 12 black construction paper
- Pencil
- Permanent marker
- Construction paper crayons
- Glue
Instructions
Introduce artist Yayoi Kusama to students by reading Yayoi Kusama Covered Everything in Dots and Wasn’t Sorry by Fausto Gilberti and looking at her infinity rooms and pumpkin artworks. Allow students to choose bright-colored paper for their pumpkin. Using a pencil, instruct students to draw a peanut shape in the middle of their paper. Have students draw two bumps on either side of the middle peanut shape. When satisfied with the pumpkin shape, students will trace the outline with permanent marker. Just like Yayoi Kusama, have students cover the pumpkin in dots—the more the better. Once the pumpkin is completed, have students use a construction paper crayon to create a pattern to cover the background. Once the background is completed, students can cut out their pumpkin and glue it onto the background.
9. Fall Grid Tree
Create a fall tree landscape as a grid artwork.

Recommended Supplies
- 12 x 18 white paper
- Pencil
- Sharpie
- Ruler
- Oil pastels
Instructions
Using a pencil and a ruler, students mark 1-inch lines horizontally and vertically to fill the paper and create the grid. Once the grid is created, they draw a tree of their choosing, tracing it with a Sharpie. Using warm (fall) colors, students color the squares in the grid for the top foliage part of the tree. Use cool colors to fill the background.
10. Leaf Man
Go on a leaf hunt on a fall day! Find leaves, sticks, and rocks and assemble them to make creatures or people like those found in the story Leaf Man by Lois Ehlert.

Recommended Supplies
- Leaves
- Cardboard
- Sticks
- Acorns
- Rocks
- Glue
Instructions
First read Leaf Man by Lois Ehlert. Then go on a leaf hunt on a fall day, and have students find leaves, sticks, and rocks. They’ll assemble them to make creatures or people like those found in the Leaf Man story. If you want it to stay outside, let it be part of nature, but if you want kids to take it home, glue all of the pieces onto a small piece of cardboard to create their own leaf creature.

What are your favorite fall art projects to do in the classroom? Come and share your ideas in our We Are Teachers HELPLINE group on Facebook.
Source link

You may also like

Ind. B School to Enforce Grade Distribution for Skill Classes
What Are Your Thoughts About A.I.? A Forum for Teenagers and Educators
